Tachyon Un-Xmit - Graphical User Interface
Tachyon Un-Xmit can be invoked via either the
Command Line Interface or the Graphical
User Interface (GUI) described here. The GUI requires
installation of Java Native Runtime support.
The GUI can be launched from the Windows Start...Programs...Tachyon... menu
or by double clicking on a file that ends in .xmi in
Windows Explorer.
Once the GUI starts, it will briefly display a window containing the
software version and license information and then ask for the name of the
TRANSMIT file to be opened. After you select
the file, a window similar to the following will be displayed.
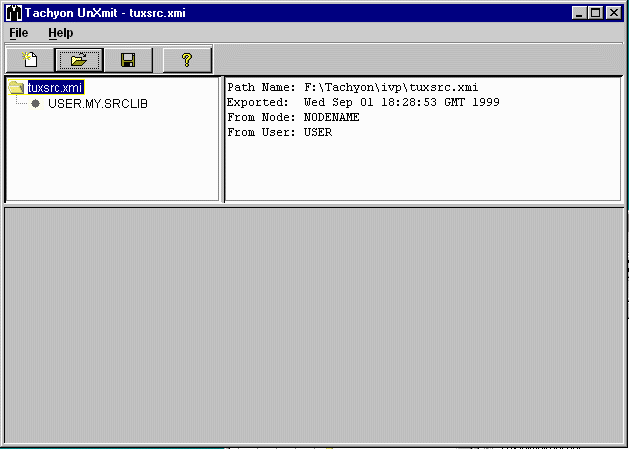
This window contains three panes. You can resize the panes within
the window by dragging the borders that separate the panes.
The pane in the upper left corner
shows a tree with the TRANSMIT file at the root and any transmitted
data sets below the root. Initially the TRANSMIT file is selected
and information about it is displayed in the pane in the upper
right corner.
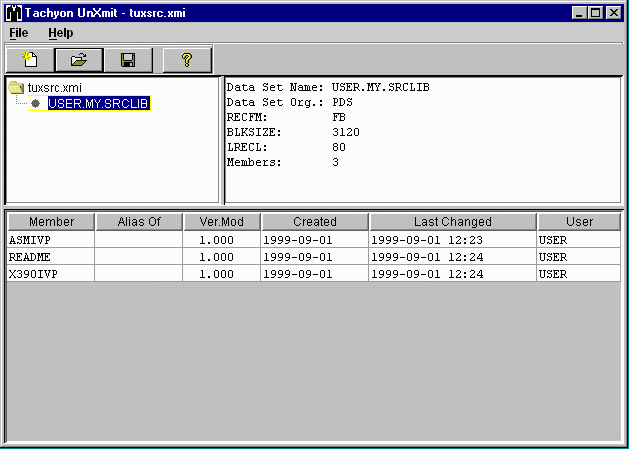
If you select a transmitted data set, information about the
data set is displayed in the pane in the upper right corner of the
window. Additionally, if the transmitted data set is a partitioned
data set, a directory list of the PDS will be displayed in the
lower window pane. The details about each member in the directory
is available if the ISPF statistics were saved in the member’s
directory entry.
An example of the main window for a TRANSMIT file containing a
message data set and a sequential data set is shown later.
An example of the main window for a TRANSMIT file containing a
message data set and a load library is also shown later.
The main window also contains menu and toolbar items for:
 File...New... (this action is descibed in the Tachyon Re-Xmit chapter)
 File...Open...
 File...Extract...
 Help...About...
If a transmitted sequential or partitioned data set is selected
in the upper left window pane, you can then select
 File...Extract... which will then
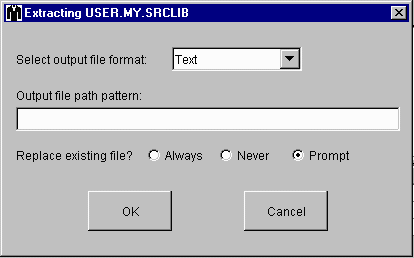
cause the following dialog window to be displayed:
If you do not want to extract all of the members of a PDS,
you should first select the members that you want to extract from the main window’s
lower pane before selecting
 File...Extract...
This dialog window asks for the output file format,
the output file name or path pattern and if existing output files
should be replaced. The output file format can be selected from the
drop-down list as follows:
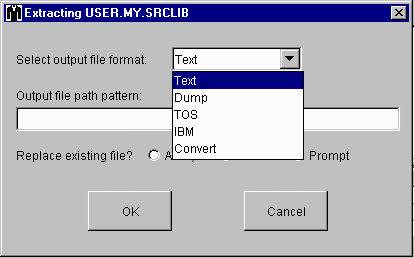
In this case the data set is not a load library, so the above
output file format selections are available. The selections for a
load library are shown later.
For this example, text output was selected.
Also, because the selected data set is a PDS, an output path
pattern is required instead of an output file name.
The path pattern must contain &M or &m.
The &M or &m is replaced by the member name
being extracted.
The &M is replaced by the member name in upper case and
&m is replaced by the member name in lower case.
If the output file name or path pattern that you enter does not contain
a directory separator character ( \ for Windows), the Tachyon Un-Xmit
GUI will create the output files in the same directory as the
TRANSMIT file.
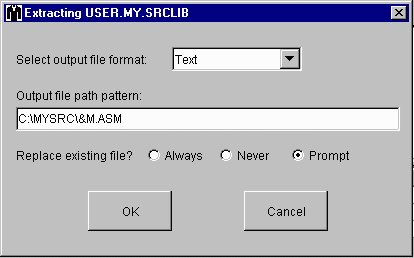
There are also three selections for Replace existing file.
If you select Always, any existing files with the same names
as extract output files will be replaced.
If you select Never, any existing files with the same names
as extract output files will be preserved and the extraction for
that file will be skipped.
If you select Prompt, any existing files with the same names
as extract output files will cause a dialog window to be displayed during
the extraction for each file. The dialog window will ask if you want to
replace the file or skip the extraction.
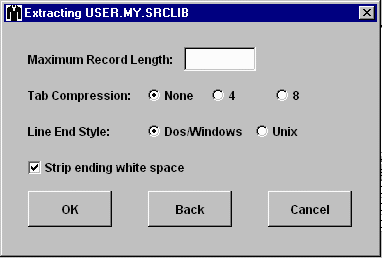
Once the OK button is selected on the dialog window above,
the following dialog window will be displayed for a Text
output file:
The dialog window displayed for the Convert output file format
is shown later and is the dialog window for the Dump output
file format.
This dialog window asks for details about the output text file.
These details include the maximum record length, tab compression
and if nonprinting characters at the end of each line should be
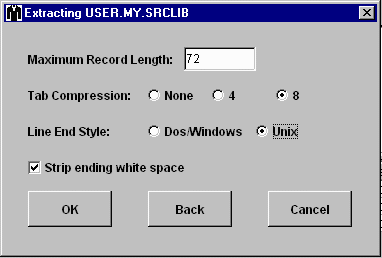
removed. In the case shown below, the maximum line length is
set to 72 which will cause any sequence numbers in columns 73-80
of the source files to be removed. Also, any sequences of blank
characters within each line will be replaced by a horizontal
tab character with the tab stops at every 8 characters, any
nonprinting characters at the end of each line will be removed
and each line will be terminated by a single line-feed character.
This example selection is good for extracting macros for use
with the Tachyon 390 Cross Assembler
and the Tachyon z/Assembler.
Once you have selected the output options, select the OK
button to start the extraction. You can also select the Back
button if you want to change your selection of the output
file format or the output file name or path pattern.
When you select OK to start the extraction,
another dialog window will be displayed showing the
progress of the extraction. If you selected Prompt
for the option of replacing existing output files, the
Tachyon Un-Xmit GUI will also display dialog windows
asking for what to do with existing output files. Once
the extraction is complete, the extraction dialog window
will look similar to this:
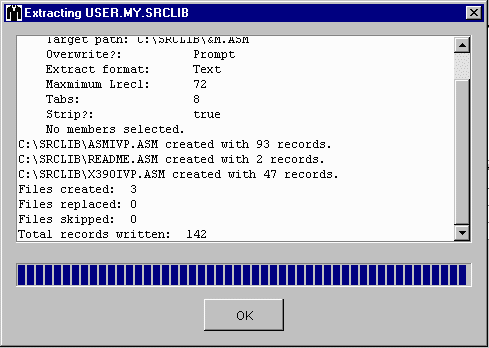
This window shows the extraction options that you selected,
the actions taken for each output file and a summary of
the extraction actions.
Sequential Data Set Extraction
The following window is an example of what Tachyon Un-Xmit
displays for a TRANSMIT file containing a transmitted sequential
data set and a message.
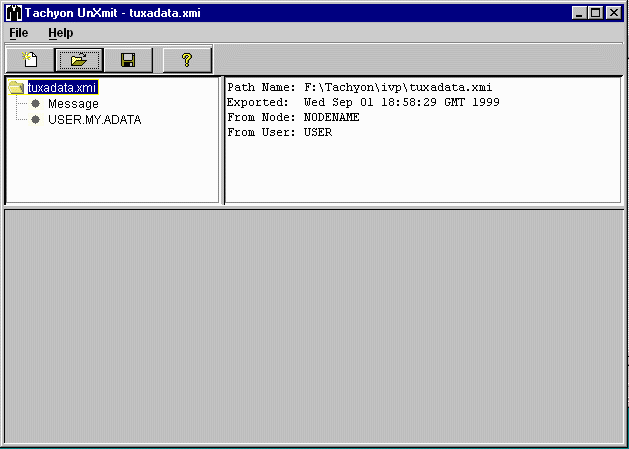
If the message data set is selected in the upper left pane,
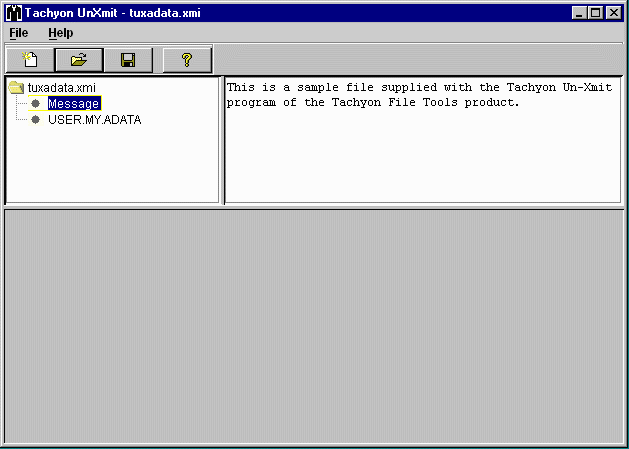
the message is displayed in the upper right pane.
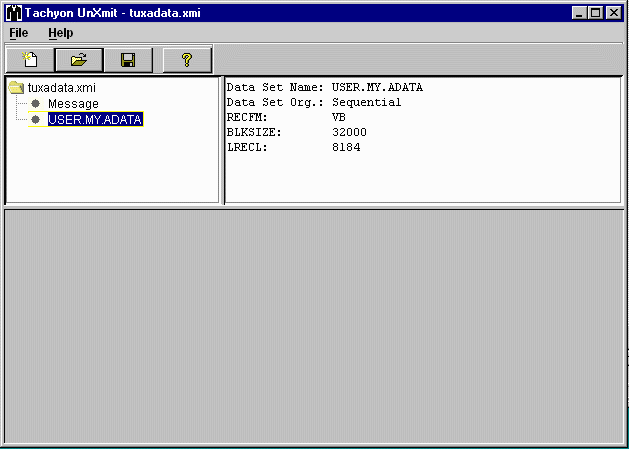
If a sequential data set is selected in the upper left pane,
the data set information is displayed in the upper right pane.
If you select  File...Extract...
for a sequential file, you will be asked for the output file format,
the output file’s path name and if you want to replace the file
if it already exists.
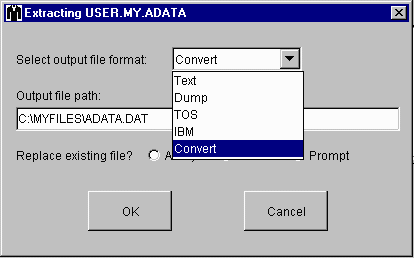
If the output file name that you enter does not contain
a directory separator character ( \ for Windows), the Tachyon Un-Xmit
GUI will create the output files in the same directory as the
TRANSMIT file.
If you select Convert
output file format, Tachyon Un-Xmit will display the following
dialog window:
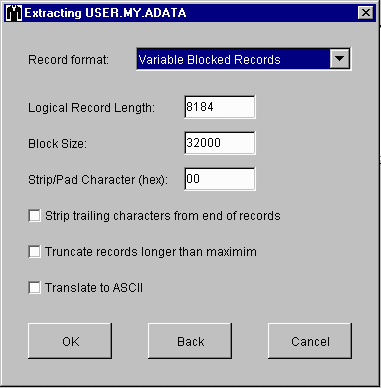
The Record format, Logical Record Length and Block Size
will be initially set from the attributes of the data set selected for extraction.
In this example, the data set to be extracted is the SYSADATA file
produced by the IBM High Level Assembler. It is being extracted so it
can be processed by IBM’s Assembler Program Understanding Tool (ASMPUT).
Because ASMPUT cannot process ADATA records with any kind of record
separators, the Convert output file format
option was selected to prevent the automatic creation of Record Descriptor
Words that would have happened for a RECFM=VB data set if
TOS or
IBM had been selected as the output file format.
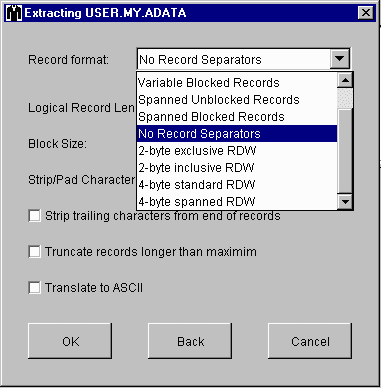
No Record Separators is being selected in the drop-down list of
this window:
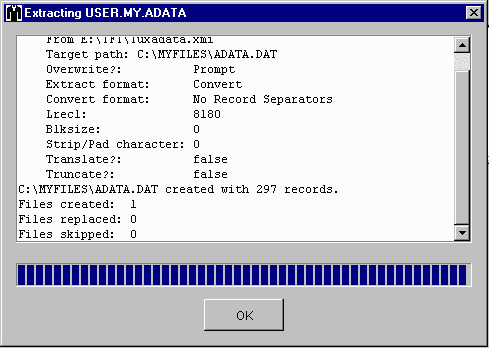
Once the extraction of a sequential file is complete,
the extraction progress dialog window will look something like this:
If you select Dump
output file format, Tachyon Un-Xmit will display the following
dialog window:
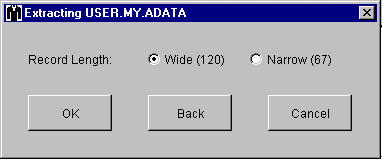
This dialog window asks you if you want the dump produced in wide
(32 bytes per line) or narrow (16 bytes per line) format.
Load Library Extraction
The following window is an example of what Tachyon Un-Xmit
displays for a TRANSMIT file containing a transmitted load library
and a message. Here, the load library data set is selected and
the load library’s directory is displayed in the lower window pane.
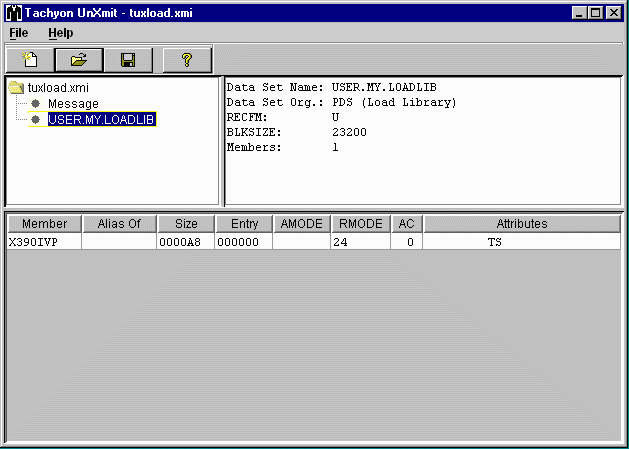
The Attributes column of the load library directory may contain
the following abbreviations:
| RF | REUS=REFR |
| RN | REUS=RENT |
| RU | REUS=SERIAL |
| TS | TEST |
| OL | Only Load |
| OV | Overlay |
| SC | Scatter Load |
| NE | Not Editable |
| NX | Not Executable |
If you select
 File...Extract...
for a load library, you will be asked for the output file format,
the output file path pattern and if you want to replace the file
if it already exists.
The path pattern must contain &M or &m.
The &M or &m is replaced by the member name
being extracted.
The &M is replaced by the member name in upper case and
&m is replaced by the member name in lower case.
In the example below, since no directory information was provided
in the path pattern, the output files will be created in the same
directory as the TRANSMIT file.
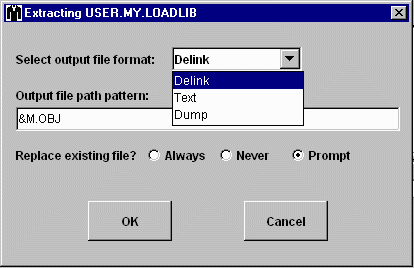
If you select Delink as shown above
the load library members will be extracted as delinked object files
suitable for relinking by the IBM z/OS binder or the
Tachyon Linkage Editor.
If you have a current license for the Tachyon Linkage Editor,
you will be given the additional
Relink option when you extract
load library members, as shown below. For a relink, the Output file
path pattern specifies the name of the relinked executable program files.
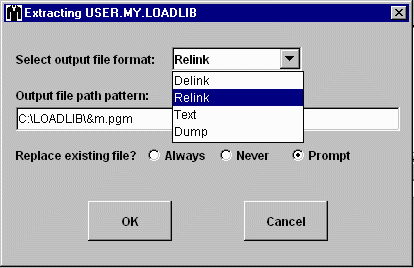
If you select Relink,
Tachyon Un-Xmit will display the following dialog window:
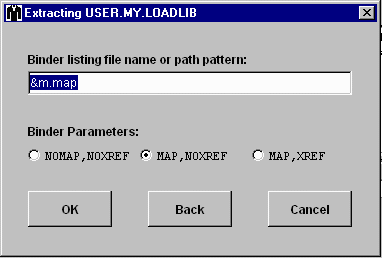
This dialog window asks you for the file name or path pattern of the
binder listing file and for the binder parameters.
You can enter a file name or a path pattern for the binder listing file.
If you enter a file name, the binder reports for all members will be written
to the same file. If you enter a path pattern, a separate listing file will be produced
for each member extracted.
A path pattern must contain &M or &m.
The &M or &m is replaced by the member name being extracted.
&M is replaced by the member name in upper case and
&m is replaced by the member name in lower case.
If the file name or path pattern does not contain a directory separator
character ( \ for Windows) as in the above example,
the listing files will be created in the same directory as the
TRANSMIT file.
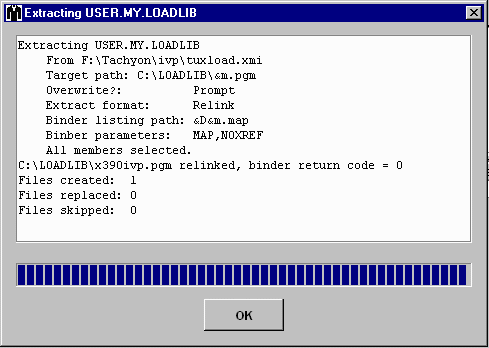
Once the relink extraction of a load library is complete,
the extraction progress dialog window will look something like this:
Frames No Frames Previous Next Contents
Introduction Setup Link Edit Un-Xmit Re-Xmit Update Utility Translation
© Copyright 1999-2002, Tachyon
Software® LLC.
Last modified on March 10, 2002


