To invoke the Tachyon Re-Xmit function to create a TRANSMIT file, select the File...New... menu item or the
Tachyon Re-Xmit can be invoked via either the Command Line Interface or the Tachyon Un-Xmit Graphical User Interface (GUI). The instructions for starting the GUI are in chapter 4, as are the instructions for using the GUI to examine and extract TRANSMIT files.
The main window of the GUI contains menu and toolbar items for:
![]() File...New...
File...New...
![]() File...Open...
File...Open...
![]() File...Extract...
File...Extract...
![]() Help...About...
Help...About...
To invoke the Tachyon Re-Xmit function to create a TRANSMIT file,
select the File...New... menu item or the
![]() toolbar button.
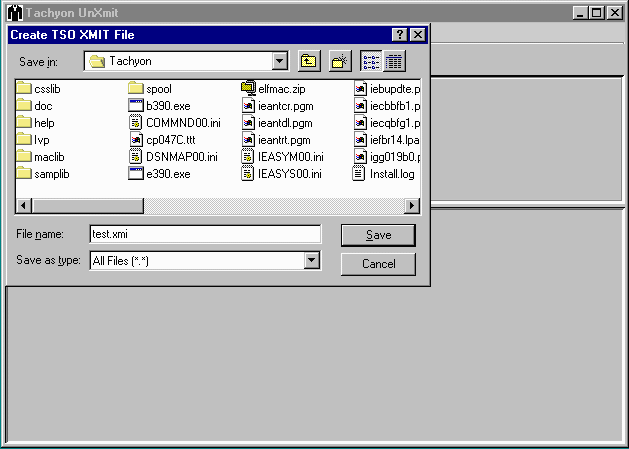
You will next see a file selection window, allowing you to select the
directory and file name of the new TRANSMIT file as follows:
toolbar button.
You will next see a file selection window, allowing you to select the
directory and file name of the new TRANSMIT file as follows:

After selecting the name of the new TRANSMIT file,
the following dialog window will be displayed:
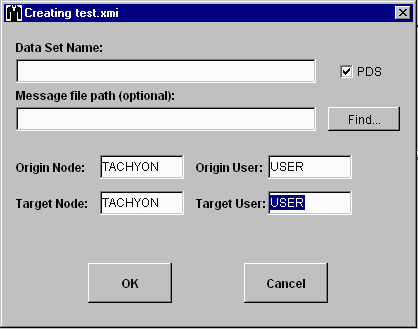
You will need to enter an MVS-style data set name in the
first entry area.
If you are transmitting a sequential file, you will need to uncheck
the PDS box.
If you want to include a message with the transmitted data,
you can enter or browse for the file that contains the
message text.
You can also change the origin and target node and user names.
Transmitting a Sequential Data Set
After entering the data set name and changing any other options,
if you unchecked the PDS box to create a TRANSMIT file
for a sequential data set, you will next see the following dialog
window:
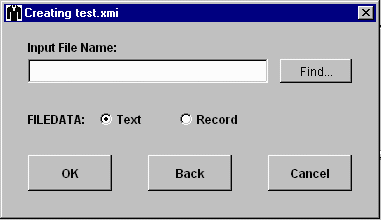
For this example, the sequential file contains
variable blocked records with standard block and record descriptor words.
To create this TRANSMIT file, you would need to select the file
and set the FILEDATA option to Record
as follows:
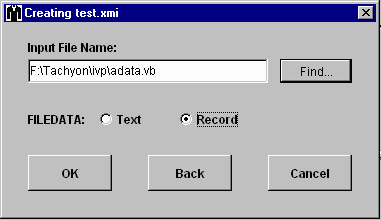
Once the OK button is selected on the window above,
the following dialog window will be displayed:
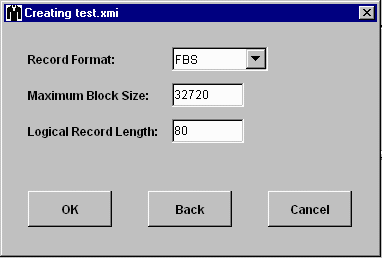
For this file, the following changes must be entered:
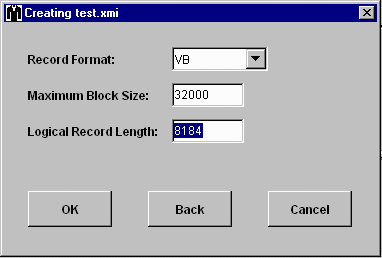
When you select OK to start creating the TRANSMIT file,
another dialog window will be displayed showing the
status of the file creation process.
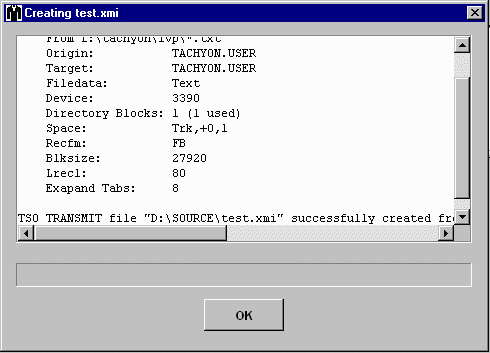
Once the file creation is complete, the dialog window
will look similar to this:
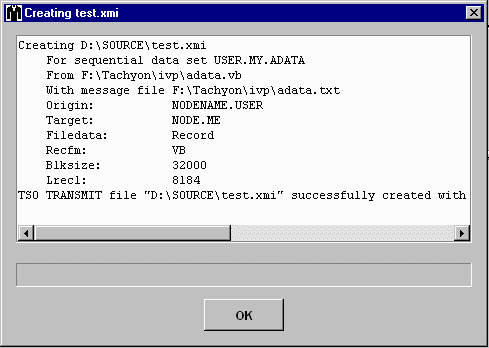
This window shows the options that you selected and a
summary of the creation action.
In order to create a TRANSMIT file for a PDS,
Tachyon Re-Xmit displays more dialog windows than it does for
a sequential data set because it needs information about the
members, the target device and storage allocation.
If the PDS box on the first dialog window remains checked
when OK is selected, the next dialog window is displayed as follows:
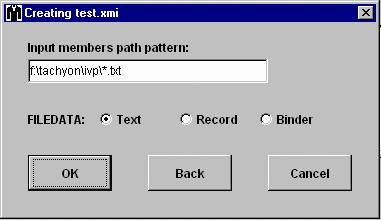
In the window above, a path pattern has been entered
to select all files in F:\tachyon\ivp that have an extension of .txt
and have file names that are also valid member names.
Also, in this case the files to be transmitted as members of the PDS
all contain ASCII text.
Once the OK button is selected on the window above,
the third dialog window will display the list of member names
selected by the path pattern. For example:
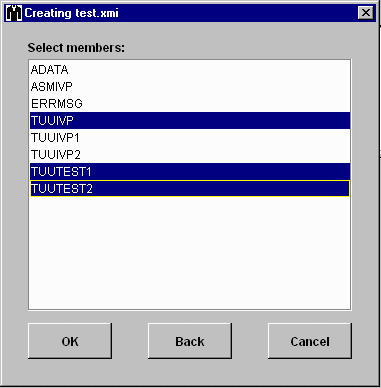
If you want to transmit all of the members listed, just select OK.
Otherwise, select only the members that you want before clicking on OK.
In the example window above, 3 of the members will be included in the
transmitted PDS.
Once the OK button is selected on the window above,
the fourth dialog window will display as follows:
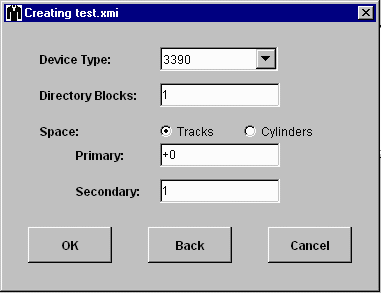
The defaults displayed here will create a transmitted PDS that was
allocated on a 3390, with enough directory blocks to hold the
directory entries of all selected members, enough tracks to hold
the data and a secondary allocation of 1 track.
Once the OK button is selected on the window above,
the fifth dialog window will display as follows:
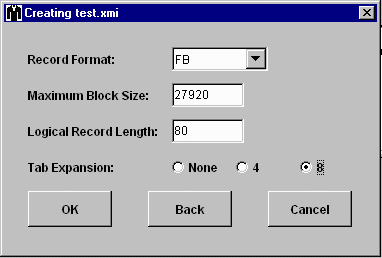
You can change record format, block size and logical record length
as needed.
In this case, because a FILEDATA Text
was selected in the second dialog window, you are also given the
option of expanding any horizontal tab characters.
The example above shows that tab stops should be set every 8 characters.
As was the case for a sequential data set, select OK to start creating the TRANSMIT file,
The status window will then be displayed:
Transmitting a Load Library
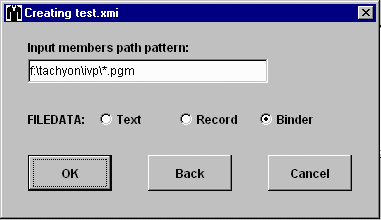
Creating a TRANSMIT file for a load library is performed just as
for any PDS, except the FILEDATA Binder
is selected on the second dialog window as follows:
If any of the members that you select were not created by the
Tachyon Linkage Editor or the
Relink function of Tachyon Un-Xmit,
you will get a message to let you know and you will then need to
deselect the invalid members.
When transmitting a load library, the fifth dialog window will look like:
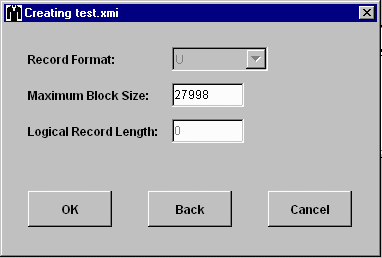
Only the block size can be changed since the record format for a
load library is always undefined.
The block size must be at least as large as the the biggest record
in any of the load modules.
You can set the maximum block size that will be created by the
Tachyon Linkage Editor using the MAXBLK option.